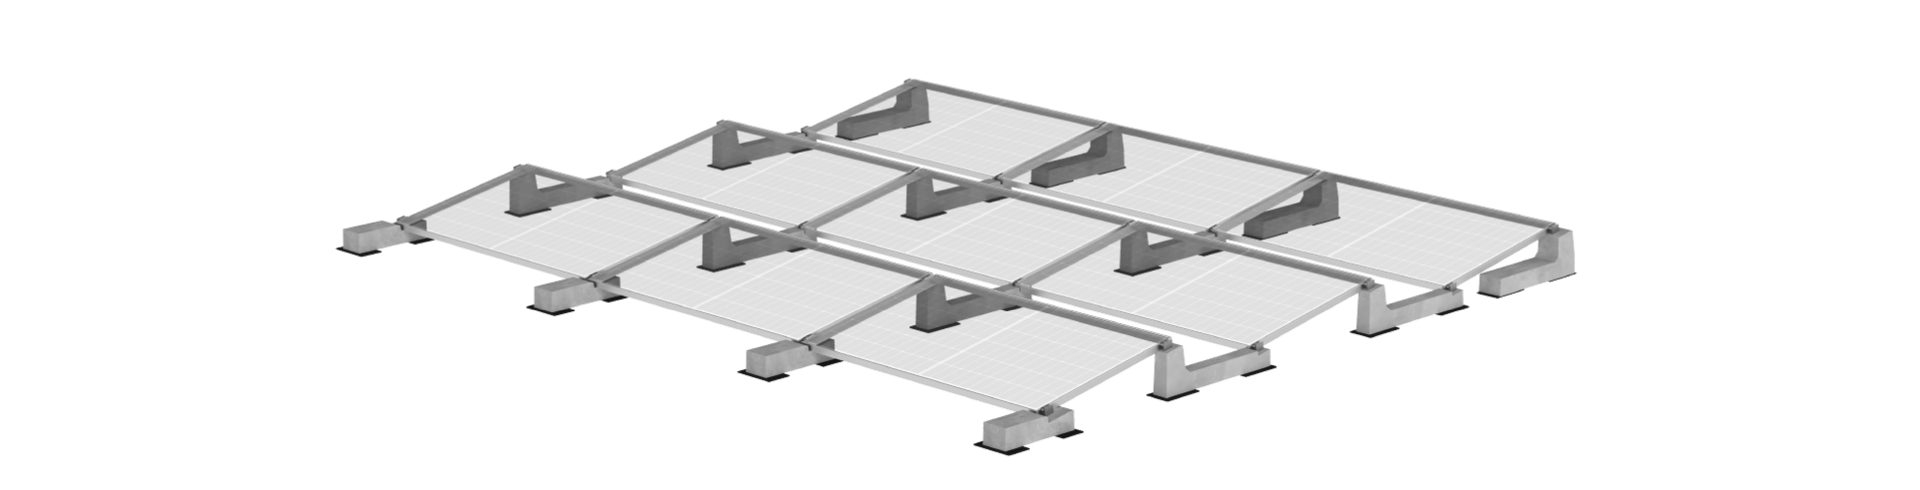
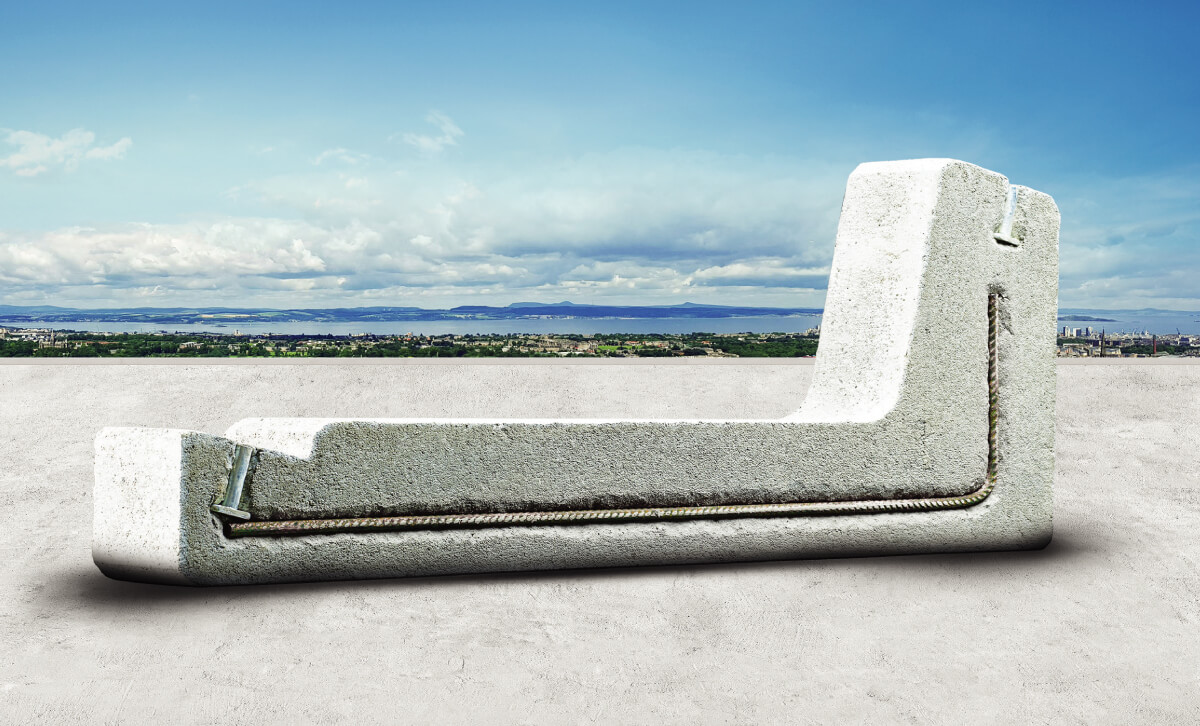
How to connect a ballast: start with the right
plan
If you’re searching for how to connect a ballast on a flat roof
photovoltaic system, the first step is understanding what “connection” really means on site.
With concrete PV ballast solutions, you’re not wiring electricity—you’re securing the support
structure, aligning module geometry, and ensuring loads are safely transferred to the roof
without penetrations. Begin with a verified layout: module orientation, tilt angle, row spacing,
and maintenance walkways. Then confirm design inputs such as wind zone, building height,
parapets, and roof membrane type. In Italy, these factors strongly influence ballast sizing and
stability checks. Before placing anything, inspect the roof surface for weak points, drains, and
expansion joints. Mark reference lines so rows stay straight and cable routes remain tidy. A
human tip from the field: the fastest installs usually come from doing the “boring” checks
upfront—because rework on a flat roof costs more time than the initial planning ever will.
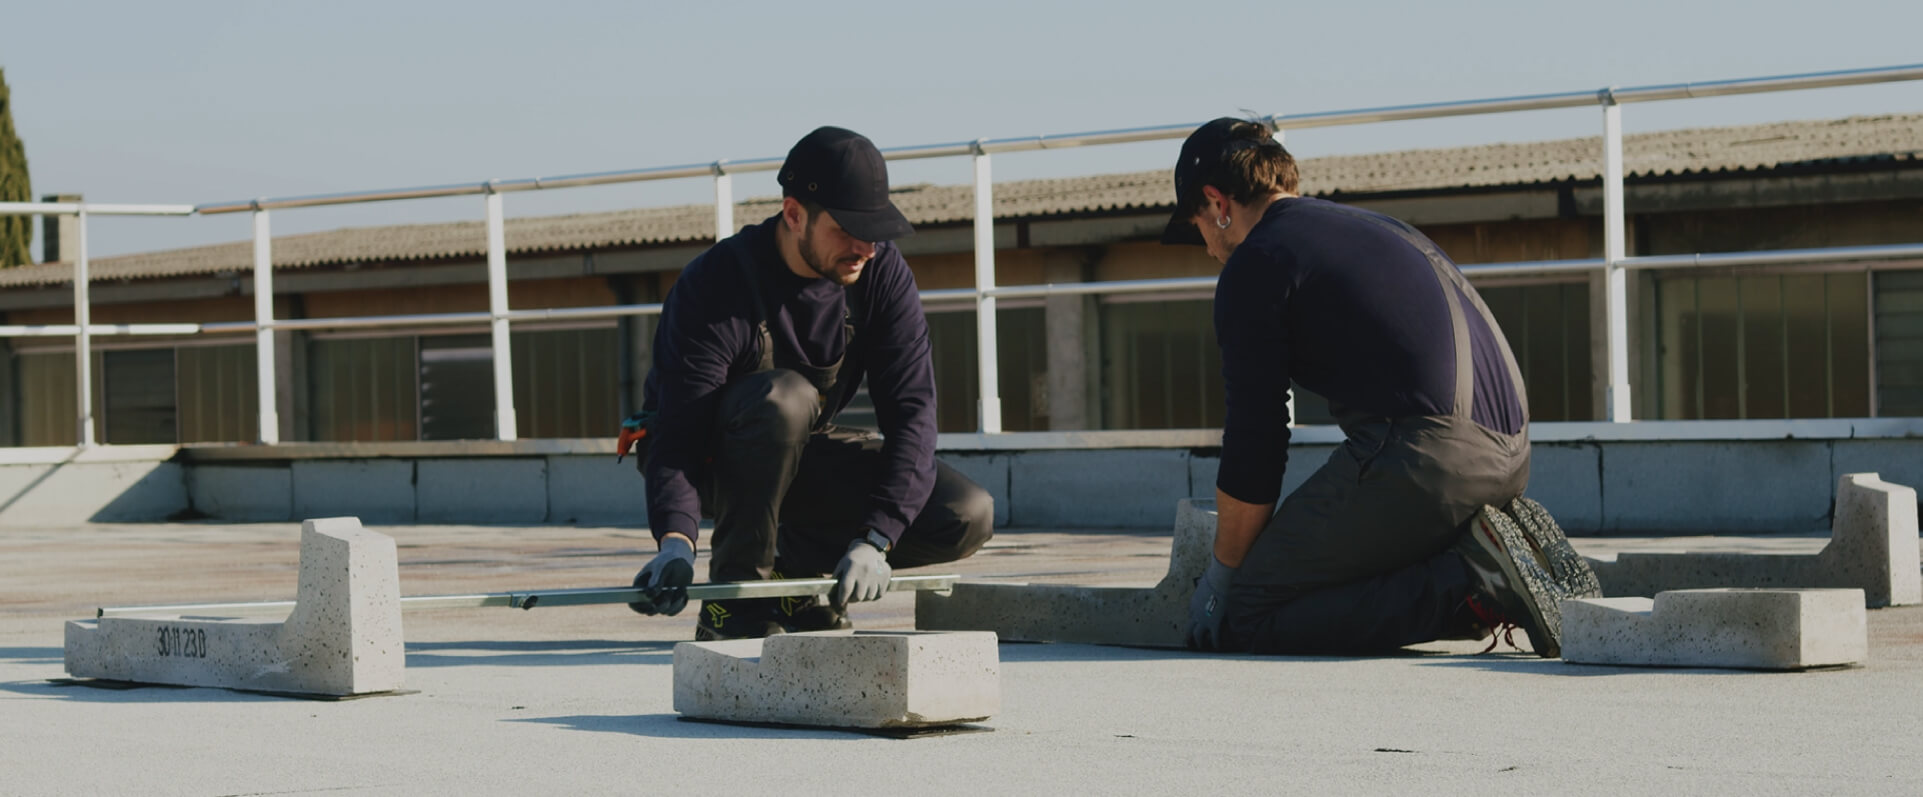
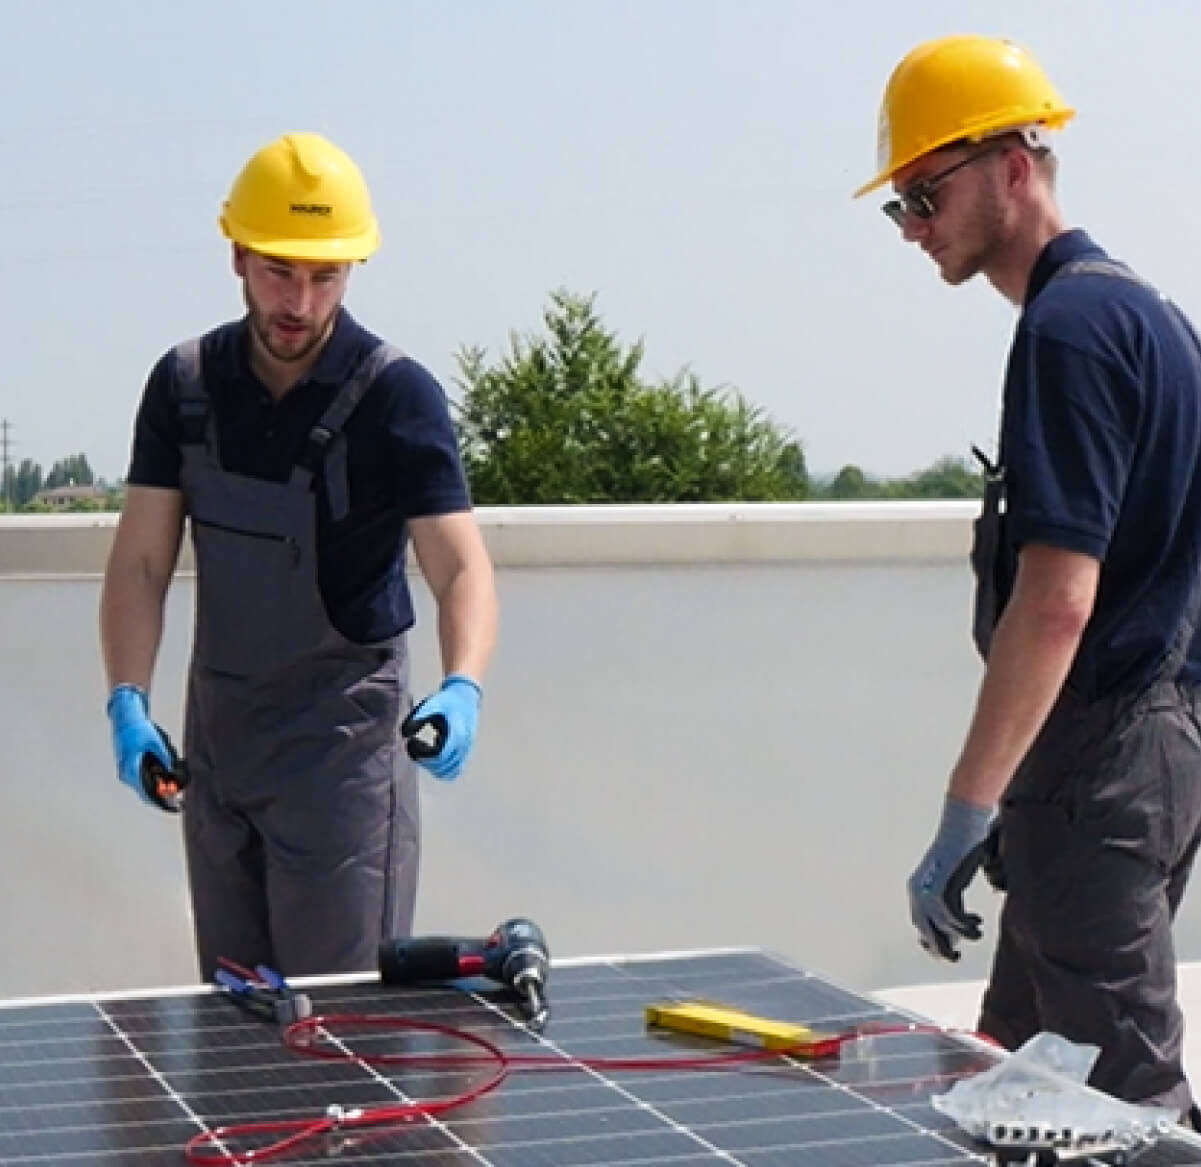
Connecting the ballast on site: placement,
alignment, and fastening
When installers ask how to connect a ballast, they often mean how
to join the ballast units and the module support parts into one rigid, reliable system. Place
each concrete ballast block according to the plan, keeping consistent distances and respecting
roof drainage paths. Next, fit the structural components (rails or brackets, depending on the
system) into their dedicated seats and lock them using the specified hardware and torque values.
Align the modules so clamps sit squarely and do not stress the frame. Check that each row is
level, that the tilt is consistent, and that adjacent units are properly coupled where the
design requires mechanical continuity. Avoid improvised fasteners or “close enough” spacing:
small deviations can create uneven load distribution under wind uplift. Finally, route DC cables
with UV-resistant clips, keep loops off the roof membrane, and maintain clear separation from
sharp edges to reduce abrasion risk.
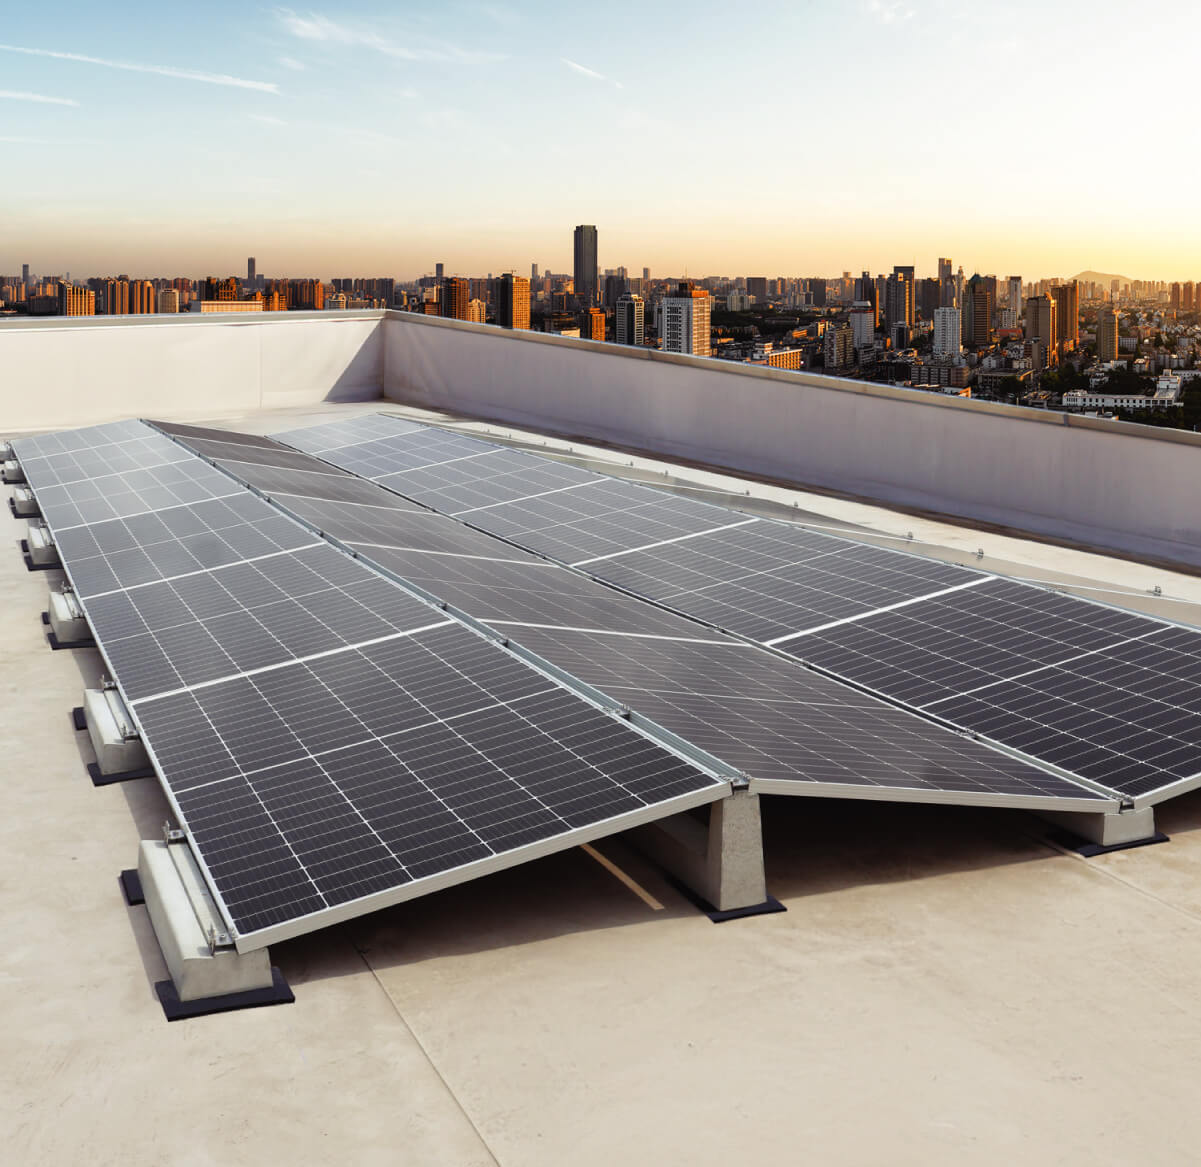
Safety, compliance, and getting support for
correct ballast sizing
A correct answer to how to connect a ballast must include safety
and verification. After assembly, perform a pull-and-shake check on representative points,
confirm clamp torque, and verify that no component can migrate on the roof surface. Review the
bill of materials to ensure you used the intended connectors and quantities—missing a single
coupling element can compromise the system’s behavior in strong winds. For designers and
engineers, documentation matters: use certified technical data, wind/load calculations, and
tested configurations to reduce project risk. For distributors and installers, reliability means
fewer callbacks and faster handover. If you want smoother projects on Italian flat roofs, choose
solutions designed to minimize components, eliminate roof drilling, and speed up placement while
still meeting structural requirements. When in doubt, lean on technical sizing support during
design—because the right ballast configuration is what turns a quick install into a durable,
bankable PV system.